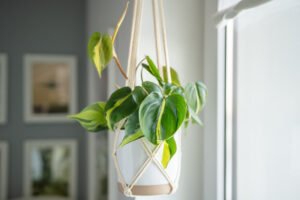
Rubber plants, scientifically known as Ficus elastica, are popular houseplants because of their glossy leaves, low-maintenance nature, and ability to thrive indoors. Whether you’re a beginner gardener or a plant enthusiast, rubber plants make a stylish addition to any indoor space. With the right care and attention, they can grow into striking focal points. In this detailed guide, you’ll learn everything you need to know about growing and caring for rubber plants.
Quick Reference Table
| Common Name | Rubber Plant, Rubber Tree |
|---|---|
| Botanical Name | Ficus elastica |
| Family | Moraceae |
| Plant Type | Perennial, Broadleaf Evergreen |
| Mature Size | 6-10 ft. indoors, up to 50 ft. outdoors |
| Sun Exposure | Bright, indirect light |
| Soil Type | Well-draining, loamy soil |
| Soil pH | 5.5 to 7.0 (slightly acidic to neutral) |
| Hardiness Zones | 10-12 (USDA) |
| Native Area | Southeast Asia |
| Toxicity | Toxic to pets and humans if ingested |
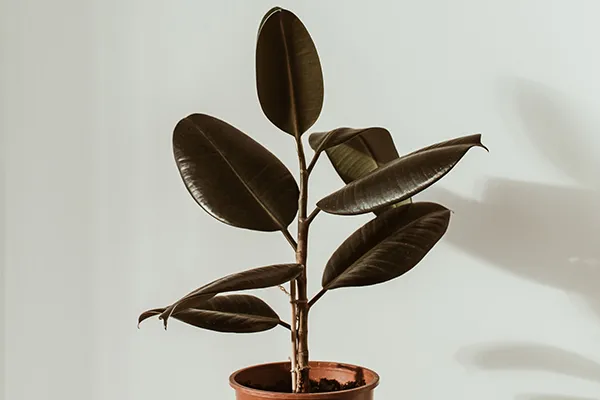
How to Grow Rubber Tree Indoors
Growing a rubber tree indoors is relatively simple, provided you mimic its natural habitat as much as possible. Rubber trees thrive in warm, humid environments with plenty of indirect sunlight. Follow these steps to ensure healthy growth:
- Light Requirements: Rubber plants prefer bright, indirect sunlight. Place your plant near an east or south-facing window, but avoid direct sunlight, which can scorch the leaves. If you notice the leaves turning pale or falling off, the plant may need more light.
- Temperature: Keep your rubber plant in a warm room with temperatures between 65°F and 80°F (18°C to 27°C). Avoid exposing it to sudden temperature changes, drafts, or air conditioning vents.
- Humidity: Rubber plants enjoy humidity. If your home has dry air, especially during the winter, consider misting the leaves occasionally or placing the plant near a humidifier.
- Watering: Allow the top 1-2 inches of soil to dry out between waterings. Overwatering can cause root rot, so it’s important not to let the soil become soggy. Use a pot with drainage holes to prevent water accumulation.
- Fertilizing: Feed your rubber plant every 2-4 weeks during the growing season (spring and summer) with a balanced liquid fertilizer. Reduce feeding in the fall and winter when growth slows down.
- Pruning: Trim any yellow or damaged leaves to keep your plant looking healthy. Pruning also helps encourage bushier growth.
By following these basic care guidelines, your rubber plant will thrive indoors and reward you with its stunning, glossy leaves.
Container and Size
Choosing the right container and size for your rubber plant is crucial to its overall health and growth. A pot that’s too small can stunt growth, while an overly large pot can lead to overwatering issues.
- Pot Size: Start with a pot that’s slightly larger than the root ball. For young plants, a pot 1-2 inches larger in diameter will provide enough space for growth. Rubber plants grow quickly, so you may need to size up as they mature.
- Pot Material: Terracotta or ceramic pots are ideal for rubber plants because they allow the soil to breathe and prevent overwatering. However, plastic pots with drainage holes also work well.
- Drainage Holes: Ensure the container has drainage holes at the bottom. Rubber plants are sensitive to standing water, which can cause root rot.
- Weight and Stability: If you have a tall rubber plant, consider a heavier pot to prevent tipping. You can also place the pot in a decorative planter to stabilize it.
Regularly check the pot size as your plant grows and adjust it as needed to maintain healthy root development.
Potting Soil and Drainage
Rubber plants thrive in well-draining, nutrient-rich soil that retains moisture but doesn’t become soggy. Choosing the right potting mix and ensuring good drainage are key factors for success.
- Ideal Soil Mix: Use a loamy, well-draining potting mix. A mixture of peat, pine bark, and perlite works well to keep the soil light and airy.
- Alternatively, you can use a standard houseplant potting soil and add perlite or sand to improve drainage.
- Drainage: Rubber plants are susceptible to root rot if the soil stays too wet. Make sure your pot has drainage holes to allow excess water to escape.
- Soil pH: Rubber plants prefer slightly acidic to neutral soil with a pH between 5.5 and 7.0. You can test the soil pH using a home testing kit and amend it if necessary.
- Amendments: Add a small amount of compost or organic matter to enrich the soil and improve nutrient retention. Avoid heavy clay soils, as they hold too much water.
With the right potting soil and proper drainage, your rubber plant will have the foundation it needs for healthy growth.
Potting and Repotting Rubber Tree
Proper potting and repotting are essential to maintaining a healthy rubber plant, especially as it grows. Here’s a step-by-step guide to potting and repotting your rubber tree:
Potting a Rubber Plant
- Choose the Right Pot: Start with a pot 1-2 inches larger than the root ball, with drainage holes.
- Prepare the Soil: Fill the bottom of the pot with a layer of well-draining soil.
- Position the Plant: Gently remove the plant from its nursery pot, being careful not to damage the roots. Place the root ball in the center of the new pot.
- Fill with Soil: Add soil around the root ball, pressing lightly to remove air pockets. Leave about an inch of space at the top to allow for watering.
- Water Thoroughly: Water the plant until excess water drains out of the bottom. Allow the topsoil to dry slightly before the next watering.
Repotting a Rubber Plant
Rubber plants need to be repotted every 2-3 years or when the roots outgrow the pot. Follow these steps:
- Timing: Repot in spring or early summer when the plant is actively growing.
- Select a New Pot: Choose a pot 2-3 inches larger than the current one.
- Remove the Plant: Gently lift the plant out of its old pot, shaking off excess soil.
- Trim Roots (Optional): If the roots are overly dense, trim them slightly to encourage new growth.
- Repot and Water: Place the plant in the new pot, add fresh soil, and water thoroughly.
Repotting refreshes the soil and gives the roots room to grow, promoting a healthier, more vigorous plant.
Moving Rubber Tree Outdoors for the Summer
Rubber plants love warm weather and can benefit from spending time outdoors during the summer months. However, transitioning them properly is essential to avoid stress or damage.
- Timing: Move your rubber plant outdoors in late spring or early summer when nighttime temperatures are consistently above 60°F (15°C).
- Gradual Transition: Start by placing the plant in a shaded or partially shaded area for a few hours a day. Gradually increase the exposure to sunlight over a week or two.
- Ideal Location: Place your plant in a spot with bright, indirect sunlight. Avoid harsh afternoon sun, as it can scorch the leaves.
- Watering: Outdoor plants may dry out more quickly. Check the soil frequently and water as needed.
- Bringing Indoors: Before fall arrives, transition the plant back indoors. Inspect it for pests, wipe down the leaves, and prune any damaged parts.
Spending the summer outdoors can encourage new growth and improve the plant’s overall health.
Common Problems Growing Rubber Tree Indoors
Despite being a hardy plant, rubber trees can encounter a few common problems when grown indoors. Here are some issues to watch for and solutions to address them:
- Yellowing Leaves: Overwatering is the most common cause of yellow leaves. Allow the soil to dry out between waterings.
- Drooping Leaves: This can occur due to underwatering, low humidity, or temperature stress. Check the soil moisture and maintain consistent care.
- Drooping Leaves: This can occur due to underwatering, low humidity, or temperature stress. Check the soil moisture and maintain consistent care. Ensure the plant isn’t near cold drafts or excessive heat.
- Brown Leaf Edges: Brown tips or edges can signal low humidity or inconsistent watering. Mist the leaves, use a humidifier, or group plants together to increase humidity.
- Pests: Common pests like spider mites, mealybugs, and scale insects can infest rubber plants. Wipe the leaves with a damp cloth regularly and treat infestations with insecticidal soap or neem oil.
- Leaf Drop: Sudden leaf drop is often caused by shock, such as moving the plant to a new location or drastic temperature changes. Allow the plant time to adjust, and avoid frequent relocations.
FAQ
1. How often should I water my rubber plant?
Water your rubber plant when the top 1-2 inches of soil feel dry. This usually translates to once every 1-2 weeks, depending on the environment.
2. Why are my rubber plant’s leaves turning yellow?
Yellow leaves are usually caused by overwatering. Allow the soil to dry between waterings and ensure proper drainage.
3. Can rubber plants grow in low light?
Rubber plants prefer bright, indirect light but can tolerate low light for short periods. However, growth may slow, and leaves might lose their luster.
4. Is the rubber plant toxic?
Yes, rubber plants are toxic to pets and humans if ingested. Keep them out of reach of children and animals.
5. How big can a rubber plant grow indoors?
Indoors, rubber plants typically grow between 6-10 feet tall, depending on care. Regular pruning can help control their size.
Read also: https://techcrunchs.net/how-to-grow-care-for-chinese-evergreen-aglaonema/