
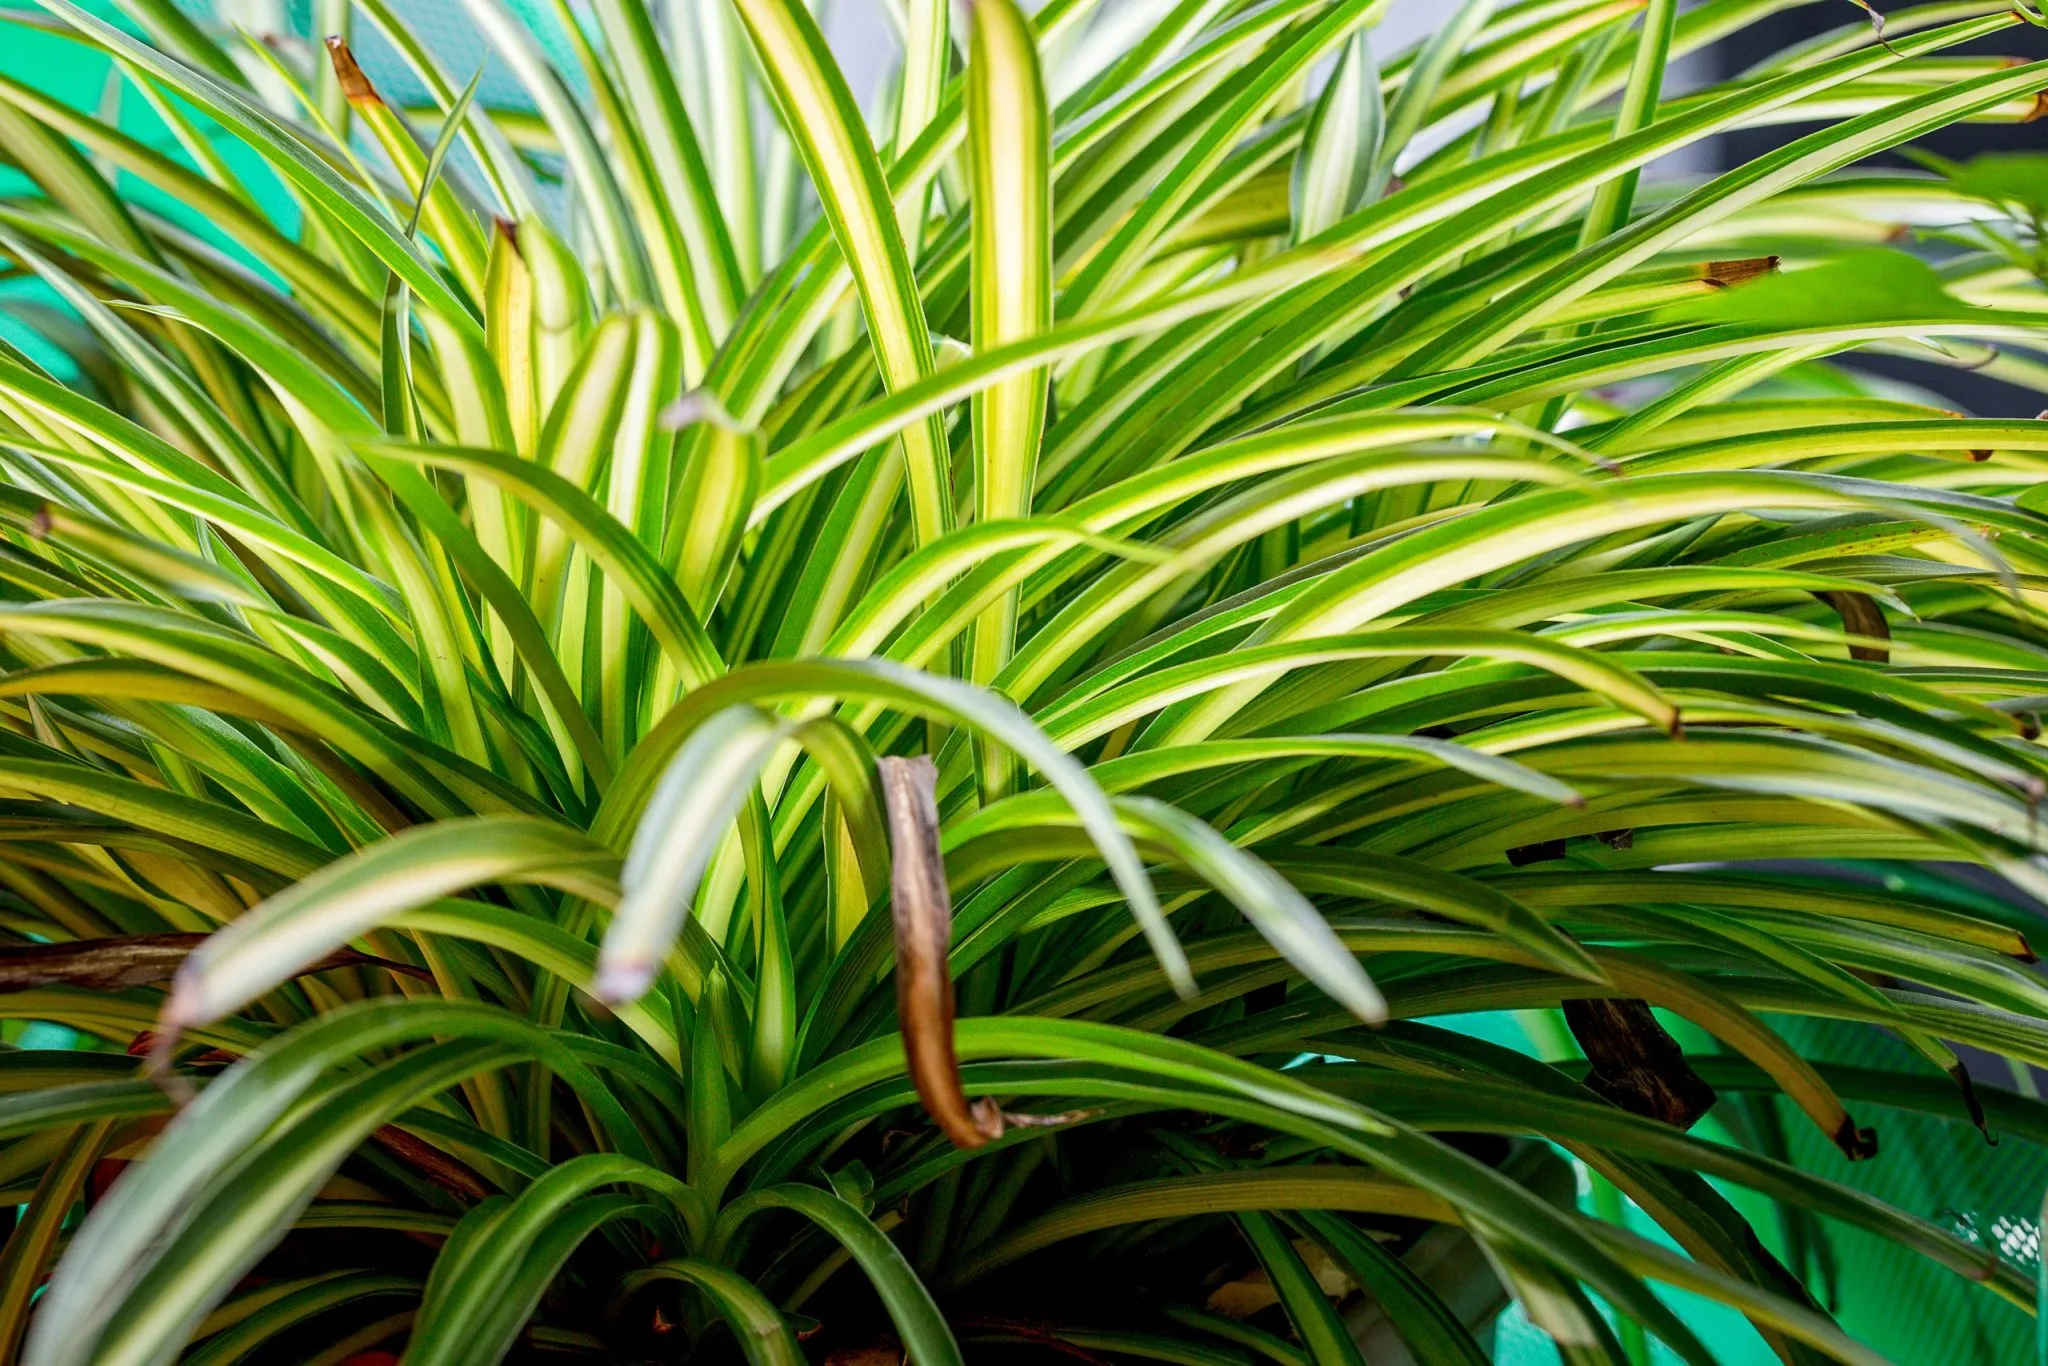
Spider plants, scientifically known as Chlorophytum comosum, are beloved by plant enthusiasts for their air-purifying qualities, resilience, and aesthetic appeal. With their arching green and white-striped leaves, these plants are not only beautiful but also incredibly easy to care for. Whether you’re a seasoned gardener or just starting your plant journey, spider plants are a fantastic choice.
Let’s dive into everything you need to know about spider plants, from their benefits to their care, propagation, and troubleshooting common problems.
Benefits of Spider Plant
Spider plants are more than just a pretty addition to your home. Here are some of the top benefits they offer:
1. Air Purification
Spider plants are natural air purifiers. According to studies by NASA, they effectively remove toxins like carbon monoxide, formaldehyde, and benzene from the air. This makes them an excellent choice for improving indoor air quality.
2. Low Maintenance
One of the most appealing aspects of spider plants is their low-maintenance nature. They thrive in a wide range of conditions and can tolerate occasional neglect, making them perfect for busy individuals or beginner plant parents.
3. Pet-Friendly
Unlike many houseplants that can be toxic to pets, spider plants are non-toxic to cats and dogs. However, some pets might nibble on the leaves, so it’s a good idea to keep an eye on them.
4. Aesthetic Appeal
With their cascading leaves and tiny “spiderettes” (baby plants), spider plants add a touch of elegance to any room. They’re versatile enough to complement any interior design style.
5. Improves Humidity
Spider plants release moisture into the air, which can help increase indoor humidity. This can be beneficial for reducing dryness in your home, especially during winter months.
Spider Plant Care
Proper care is key to keeping your spider plant healthy and thriving. Here’s a detailed guide:
1. Lighting Requirements
Spider plants prefer bright, indirect sunlight. Direct sunlight can scorch their leaves, while low light can slow growth. Place them near an east or west-facing window for optimal lighting.
2. Watering
Water your spider plant when the top inch of soil feels dry. Overwatering can lead to root rot, so ensure the pot has good drainage. During winter, reduce watering frequency as the plant’s growth slows down.
3. Temperature and Humidity
Spider plants thrive in temperatures between 65-75°F (18-24°C). They prefer moderate to high humidity levels but can adapt to drier conditions. If the air in your home is very dry, consider misting the plant occasionally.
4. Soil
Use a well-draining potting mix to prevent water from sitting in the soil. A mix designed for houseplants or one containing peat and perlite works well.
5. Fertilizing
Feed your spider plant with a balanced liquid fertilizer every 4-6 weeks during the growing season (spring and summer). Avoid over-fertilizing, as this can cause leaf tip burn.
Types of Spider Plant
There are several varieties of spider plants, each with unique features. Here are some popular types:
1. Variegated Spider Plant (Chlorophytum comosum ‘Variegatum’)
This is the most common type, characterized by green leaves with white edges. It’s a classic choice for both beginners and experienced plant owners.
2. Reverse Variegated Spider Plant (Chlorophytum comosum ‘Vittatum’)
This variety has white leaves with green edges, giving it a slightly different aesthetic.
3. Bonnie Spider Plant
The Bonnie spider plant features curly leaves and yellow-green variegation. Its compact, curly shape makes it a favorite for smaller spaces.
4. Solid Green Spider Plant
As the name suggests, this variety has solid green leaves without any stripes. It’s less common but equally attractive.
Pruning
Regular pruning keeps your spider plant healthy and promotes new growth. Here’s how to do it:
1. Why Prune?
Pruning helps remove dead or discolored leaves, encourages new growth, and prevents the plant from becoming too leggy.
2. How to Prune
- Use clean, sharp scissors or pruning shears.
- Trim away any yellow or brown leaves at their base.
- Cut back overly long or unruly stems to maintain the plant’s shape.
3. When to Prune
The best time to prune is during the growing season (spring and summer). Avoid heavy pruning during winter when the plant is dormant.
Propagating Spider Plants
Propagating spider plants is easy and rewarding. Here’s a step-by-step guide:
1. Using Spiderettes
Spider plants produce baby plants, or spiderettes, that hang from the mother plant. These can be propagated easily.
Steps:
- Wait until the spiderettes develop small roots.
- Cut the spiderette from the mother plant.
- Place it in water or directly into soil.
- Keep the soil moist until new growth appears.
2. Division Method
If your spider plant has outgrown its pot, you can divide it into smaller plants.
Steps:
- Remove the plant from its pot.
- Gently separate the root ball into smaller sections.
- Replant each section in its own pot with fresh soil.
How to Grow Spider Plant From Seed
Growing spider plants from seeds is less common but possible. Here’s how:
1. Collecting Seeds
Spider plants produce small, black seeds after flowering. Collect these seeds once they are dry.
2. Planting Seeds
- Fill a seed tray with a well-draining potting mix.
- Plant the seeds about ¼ inch deep.
- Water gently to moisten the soil.
- Cover the tray with plastic wrap or a lid to retain humidity.
3. Caring for Seedlings
Place the tray in a warm, bright spot. Keep the soil moist but not soggy. Germination can take 2-4 weeks. Once the seedlings are large enough, transplant them into individual pots.
Potting and Repotting Spider Plant
1. When to Repot
Spider plants grow quickly and may become root-bound. Repot every 1-2 years or when roots start poking out of the drainage holes.
2. How to Repot
- Choose a pot 1-2 inches larger than the current one.
- Remove the plant gently from its pot.
- Loosen the roots and trim any damaged sections.
- Place the plant in the new pot with fresh soil.
- Water thoroughly to settle the soil.
Common Pests & Plant Diseases
Spider plants are hardy, but they can occasionally face pests and diseases. Here’s how to handle them:
1. Pests
- Aphids: Small, green insects that suck sap from leaves. Treat with insecticidal soap.
- Spider Mites: Tiny red or yellow spots on leaves may indicate spider mites. Increase humidity and use neem oil to deter them.
- Mealybugs: White, cotton-like spots on leaves are a sign of mealybugs. Wipe them off with a cotton swab dipped in alcohol.
2. Diseases
- Root Rot: Caused by overwatering. Ensure proper drainage and remove affected roots.
- Leaf Tip Burn: Often due to fluoride in tap water. Use filtered or distilled water instead.
Common Problems With Spider Plant
1. Brown Leaf Tips
This is the most common issue and is usually caused by over-fertilizing, underwatering, or fluoride in water. Adjust your care routine accordingly.
2. Yellow Leaves
Yellowing leaves can indicate overwatering or insufficient light. Check the soil and lighting conditions.
3. Slow Growth
Spider plants may grow slowly if they’re not getting enough light or nutrients. Ensure they have adequate light and feed them during the growing season.
FAQ
1. How often should I water my spider plant?
Water when the top inch of soil feels dry. Typically, this is once a week, but it may vary depending on your home’s humidity and temperature.
2. Can spider plants survive in low light?
Yes, they can tolerate low light, but they thrive in bright, indirect sunlight. Low light may slow their growth and dull their colors.
Read Next: https://techcrunchs.net/how-to-remove-dandelions-from-your-yard/